How Does a Car Voltage Tester Work Step by Step
Car electrical problems can be frustrating, especially when you’re unsure whether the battery, alternator, fuse, or wiring is at fault. You’re not alone—many people struggle to diagnose these issues without the right tool.
Understanding how a car voltage tester works can help you find problems faster and choose the best tester for your needs.
A car voltage tester compares electrical potential between two points. Set your digital multimeter to DC voltage, choose a 20-volt range, and plug the black lead into COM and the red lead into the voltage jack.
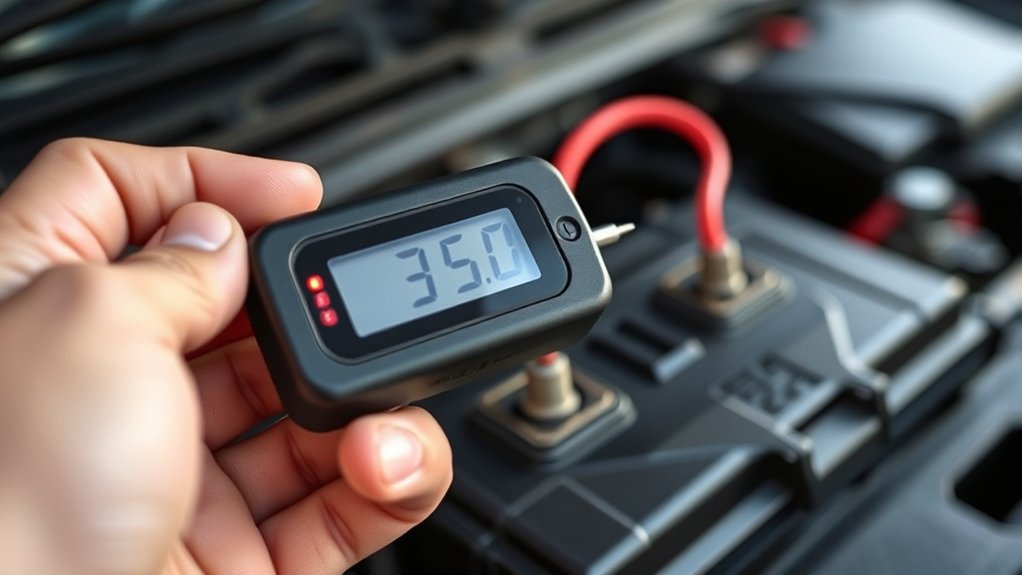
Touch the probes to the battery terminals: you should see about 12.6 volts with the engine off. Running voltage should reach 13.7–14.7 volts.
You can also test fuses, wiring, and grounds for voltage drops, as the steps below explain.
Key Takeaways
- Set the multimeter to DC voltage and select a range covering 12–20 volts. Plug the black lead into COM and the red lead into the voltage port.
- With the engine off, touch the red probe to the battery’s positive terminal and the black probe to the negative terminal to measure resting voltage.
- Interpret approximately 12.6 volts as fully charged. Readings near 12.0 volts indicate a significantly discharged battery.
- Start the engine and measure again. A reading of approximately 13.7–14.7 volts indicates that the alternator is charging properly.
- Test fuses and voltage drops by probing both fuse terminals or circuit connections. This can help identify blown fuses and excessive electrical resistance.
What Does a Car Voltage Tester Measure?
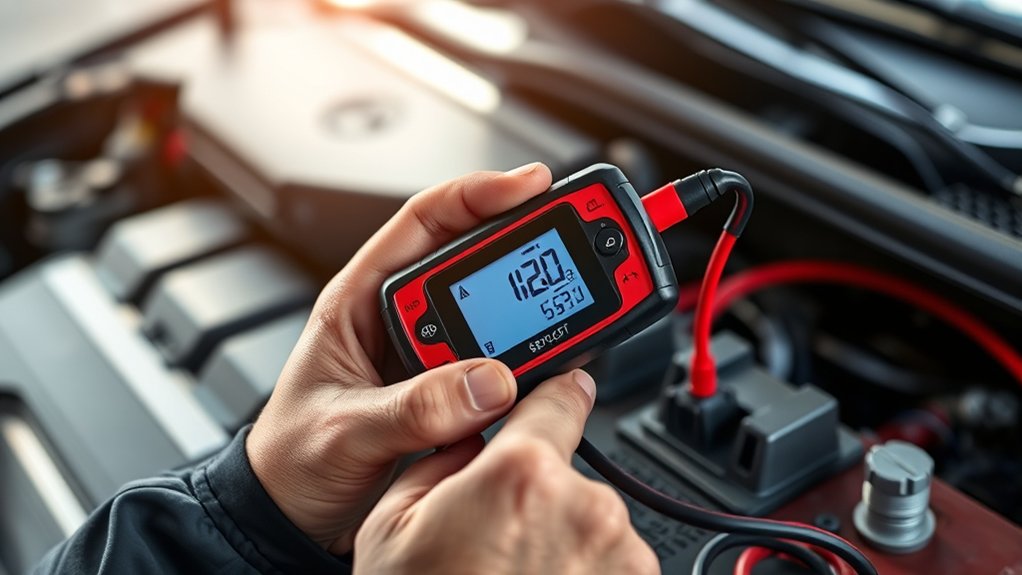
A car voltage tester measures the electrical potential difference, or voltage, between two points in a vehicle’s electrical system. You use it to see how strongly the battery and charging components supply electrical energy.
When you test directly across the battery terminals, the reading reflects battery health. A healthy, fully charged battery usually shows about 12.6 volts with the engine off. A lower reading may indicate discharge, while a significant drop during starting can suggest a weak battery.
With the engine running, you can measure the alternator’s charging output at the battery. The voltage should typically rise into the 13.7-to-14.7-volt range, depending on the vehicle.
You can also check voltage at fuses, switches, sockets, and other circuits to identify supply losses or interruptions. Comparing readings at different points helps you locate resistance, poor connections, or damaged wiring.
The tester measures voltage only. It doesn’t directly measure current, battery capacity, or component condition.
Choose a Meter for Automotive Voltage Testing
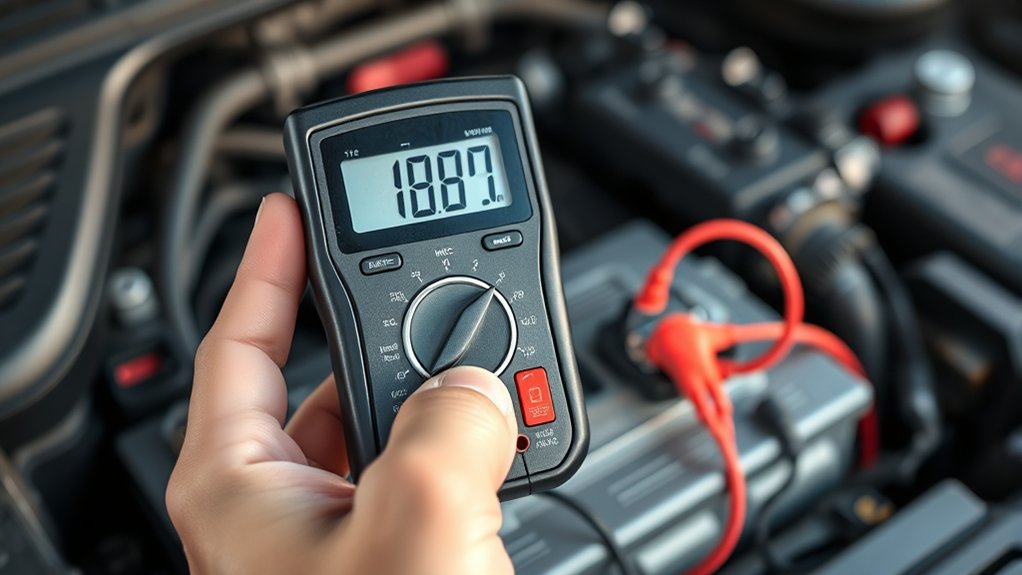
Choose a digital multimeter for most automotive voltage testing because it provides accurate readings and lets you check both DC voltage and continuity. Select a model with an easy-to-read display, clearly marked ranges, and sturdy test leads.
An auto-ranging meter simplifies checks by choosing the proper measurement range. A manual-ranging model can offer more control when you understand expected values.
For battery maintenance, choose a meter that measures DC voltage to at least 20 volts. This range covers common 12-volt batteries and charging-system checks.
Look for input protection, fused current terminals, and a durable case if you’ll use the tool frequently. A min/max function can capture voltage fluctuation during starting or charging tests, helping you spot unstable readings.
If you’ll inspect sensors, wiring, or electronic modules, select a meter with resistance, continuity, and frequency functions. A quality meter doesn’t need to be expensive, but it should provide reliable accuracy, readable results, and dependable performance for routine automotive diagnosis.
Follow Safety Steps Before Testing

Before connecting your meter, take a few safety precautions to protect yourself, the vehicle, and the tester. Park on a level surface, switch off the ignition, remove the key, and engage the parking brake.
Keep loose clothing, jewelry, and hair away from belts, fans, and other moving parts. Work in a well-ventilated area, especially near a charging battery, because battery chemistry can produce explosive hydrogen gas.
Keep hair, clothing, and jewelry clear of moving parts, and ensure good ventilation to disperse potentially explosive hydrogen gas.
Never smoke, create sparks, or place metal tools across the battery terminals. Wear safety glasses and insulated gloves if you’ll handle exposed terminals or investigate corrosion.
Check the battery and wiring for cracks, swelling, leaks, frayed insulation, or loose connections. Don’t test damaged components until you’ve addressed the hazard.
Keep your hands dry, and use only a meter and leads with intact insulation. Turn off accessories to reduce voltage fluctuations and prevent unexpected electrical loads.
Finally, consult the vehicle’s service information for special precautions around airbags, hybrid systems, and sensitive electronics.
Set the Tester to DC Voltage
Set your tester to DC voltage mode when measuring your car’s battery or electrical system. Choose a voltage range that covers the expected reading, then connect the test leads correctly.
Select DC Voltage Mode
Switch the tester to DC voltage mode, marked “V⎓” or “DCV,” so it can measure the steady electrical potential produced by the car’s battery and charging system. This setting matches the type of current found in most vehicle circuits.
Insert the black probe into the COM jack and the red probe into the voltage jack, then confirm the tester displays the DC symbol.
Don’t select AC voltage, resistance, or continuity; those modes can produce misleading readings or create a safety risk when connected to an energized circuit.
Selecting DC voltage supports accurate battery maintenance by showing whether the battery receives proper charging voltage. It also helps you evaluate voltage regulation as the alternator supplies power.
Keep the tester set to this mode while preparing for the measurement, without changing the range yet.
Choose the Voltage Range
Choose a voltage range that includes the vehicle’s expected reading, typically 20 volts DC for a 12-volt system. This setting gives you enough capacity to measure a charged battery, alternator output, and common circuit readings without overloading the tester’s display.
If your device offers manual ranges, select the lowest setting above the expected voltage for better resolution. For systems with higher voltage, choose a range that safely exceeds the maximum possible reading.
Check the tester’s markings carefully because some models combine AC and DC ranges or use different symbols. Battery corrosion can contribute to unusual readings, while voltage fluctuations may cause the displayed value to move slightly.
A suitable range helps you distinguish normal variation from a potential electrical fault during your measurement. Don’t use resistance or current settings for voltage checks.
Connect the Test Leads
With the voltage range selected, connect the black lead to the tester’s COM port and the red lead to the port marked for voltage or volts. Make sure each plug sits firmly, and don’t use the current or amp port for this test.
Turn the selector to DC voltage, usually shown as V with a solid and dotted line. DC mode lets you measure the steady electrical pressure produced by your vehicle’s battery and alternator.
Keep the probes’ metal tips from touching each other while the tester is connected. For battery indicators, place the black probe on the negative terminal and the red probe on the positive terminal.
When checking charging systems, use the same polarity at the battery posts. Hold the insulated handles, and take your reading with the engine off or running as directed.
Connect the Probes Correctly
Connect the black probe to the tester’s COM or negative terminal and the red probe to the positive or voltage terminal. Push each plug firmly into its socket so it won’t loosen during use. Keep the probe tips separated until you’re ready to make contact, preventing accidental shorts.
Hold the insulated sections rather than the metal tips. Inspect the leads for cracked insulation, exposed wire, or bent connectors before connecting them. Replace damaged leads because they can produce inaccurate readings or create a shock and spark hazard.
Confirm that your tester uses the correct input for voltage. Current or resistance terminals may damage the meter or vehicle electronics.
Clean heavy Battery corrosion from accessible connection points with an appropriate brush, while avoiding direct contact with residue. Correct probe placement helps you evaluate electrical conditions safely and supports later checks of Alternator function.
Don’t switch terminals while the circuit remains energized. Disconnect the probes by gripping their insulated handles.
Test the Car Battery With a Voltage Tester
Turn off the car and switch the voltage tester to DC volts before testing the battery. Put on safety glasses and keep metal tools away from the terminals. Locate the battery, then identify the positive (+) and negative (–) posts. If you see Battery corrosion, clean the terminals carefully before connecting the probes.
- Touch the red probe to the positive post.
- Touch the black probe to the negative post.
- Hold both probes firmly without letting them contact each other.
- Keep the tester steady while you inspect the connection and prepare to record the reading.
Don’t test a frozen, cracked, or leaking battery; replace it or seek professional help instead. You can also use this check when troubleshooting Charging systems, since loose terminals or damaged cables can affect the test.
Keep the engine off during this basic battery test, and remove the probes in reverse order when you’re finished. This procedure gives you a clean measurement setup without placing unnecessary strain on the battery or tester.
Read and Interpret Battery Voltage
Once the probes are properly positioned, read the voltage shown on the tester’s display. With the engine off, a healthy, fully charged battery usually measures about 12.6 volts. A reading near 12.4 volts indicates roughly 75 percent charge, while 12.2 volts suggests about 50 percent. If you see 12.0 volts or less, the battery is markedly discharged and may not start the engine.
A fully charged battery reads about 12.6 volts; lower readings indicate reduced charge and potential starting problems.
Next, start the engine and check the reading again. A properly working charging system typically raises voltage to approximately 13.7–14.7 volts. This increase shows that the alternator is replenishing the battery.
If voltage stays near the resting value, the alternator, wiring, or regulator may need attention. A reading above 15 volts can indicate overcharging, which may damage electrical components or shorten battery life.
Compare your results with the vehicle manufacturer’s specifications. Temperature affects readings, so allow for small variations. Record each measurement to track battery health over time and identify gradual performance changes.
Test Automotive Fuses With a Voltage Tester
To test an automotive fuse, first locate it in the fuse box. Then, touch your voltage tester to each terminal on the fuse and check the readings. If both terminals show voltage, the fuse is working. If only one terminal shows voltage, the fuse is likely blown.
Locate the Fuse
Start by locating your vehicle’s fuse box, which is usually beneath the dashboard, under the hood, or in the side panel near the driver’s door. You’ll need the correct fuse before testing the electrical circuit.
- Check your owner’s manual for the fuse box diagram and circuit labels.
- Remove the fuse box cover carefully, then study its underside for a matching layout.
- Identify the fuse connected to the component you’re troubleshooting, such as the headlights, radio, or blower motor.
- Confirm the fuse’s amperage rating and shape before removing anything.
Use the diagram to distinguish mini, micro, and standard blade fuses. If labels seem unclear, compare the fuse position with the manual’s illustration.
Don’t pull a fuse randomly. Choosing the wrong one can interrupt another system or damage sensitive components.
Check for Voltage
With the correct fuse identified, switch your voltage tester to the appropriate DC setting and connect its ground clip to a clean, unpainted metal surface. Turn the ignition to the position that powers the circuit, but don’t start the engine unless the vehicle requires it.
Touch the tester’s probe to each exposed test point on top of the fuse. Watch the display or indicator light and note whether voltage reaches both points.
Keep the probe steady and avoid bridging the terminals with the metal tip. If you get no reading, confirm the ground connection, ignition position, and tester operation before continuing.
This simple check supports accurate electrical diagnostics and helps you avoid unnecessary part replacements. Include this habit in routine Battery maintenance, especially when accessories behave inconsistently or a circuit suddenly stops operating.
Identify a Blown Fuse
A blown fuse usually shows battery voltage on only one test point, while a good fuse shows voltage on both. Set your voltage tester to DC volts, connect its ground clip to a clean metal surface, and turn the ignition on when the circuit requires power.
Touch the probe to each exposed fuse test point. Compare the readings carefully:
- Voltage on both points: the fuse works.
- Voltage on neither point: check power, ground, or the circuit.
- Voltage on one point: the fuse is blown.
- No stable reading: improve the ground or probe contact.
Switch off power before removing the fuse. Match the replacement’s amperage exactly; never install a larger fuse.
Complete a Circuit inspection for shorts or damaged wiring before Fuse replacement, then retest the circuit.
Check Alternator Voltage With the Engine Running
Once the engine runs, measure the alternator’s output at the battery terminals with your voltage tester. Set the meter to DC volts, then touch the red probe to the positive post and the black probe to the negative post. Keep your hands, leads, and clothing away from moving belts and fans.
A healthy charging system typically reads about 13.7 to 14.7 volts at idle. If the reading stays near the battery’s resting voltage, the alternator might not charge.
A reading above the normal range can indicate an overcharging condition that may damage electronic components or the battery. Turn on the headlights and blower, then watch the display.
The voltage should remain within the manufacturer’s specified range, though it may drop slightly under load.
Record your result for battery maintenance and alternator diagnostics. Compare it with your vehicle’s service specifications before replacing parts.
Shut off the engine and remove the tester when you finish.
Test for Voltage Drops in Wires and Grounds
Test voltage drops by measuring across each power or ground connection while the circuit operates under load. Set your car voltage tester to DC volts, then place the probes on both ends of the connection.
A healthy cable or ground shows almost no voltage. A higher reading reveals resistance that can cause dim lights, slow cranking, or unreliable sensors.
- Connect the red probe to the battery’s positive post and the black probe to the component’s power terminal.
- Activate the circuit, such as headlights, a blower, or the starter.
- Repeat the test on the ground side, placing probes between the component ground and the battery negative post.
- Clean, tighten, or replace connections when readings exceed your vehicle’s specification.
Keep the engine running only when the circuit requires it, and avoid shorting probe tips.
Include these checks in routine Battery maintenance. Accurate Wiring diagnostics help you find hidden corrosion, damaged cables, and loose grounds before they become expensive failures.
Record each reading for comparison during future service.
Frequently Asked Questions
How Often Should You Calibrate a Car Voltage Tester?
You should calibrate a car voltage tester annually, or according to the manufacturer’s instructions. If you use it frequently for Battery testing or Circuit analysis, check calibration every six months.
Recalibrate it sooner after drops, repairs, extreme temperatures, or questionable readings. Compare it with a trusted reference voltage before important diagnostics.
Keep records of each check, and replace the tester if it won’t hold calibration or consistently produces inaccurate results during testing.
Can a Car Voltage Tester Diagnose Intermittent Electrical Problems?
Like a flashlight flickering in a storm, a car voltage tester can help you diagnose intermittent electrical problems, but it won’t catch every fault. You can monitor voltage during starting, charging, and accessory use, watching for sudden drops or spikes.
Check battery health first, then perform alternator testing under different conditions. Wiggle wires, connectors, and grounds while measuring.
For elusive problems, you’ll need a multimeter, test light, or professional scan tool.
What Maintenance Does a Digital Voltage Tester Require?
You’ll maintain a digital voltage tester by checking its leads, probes, display, and battery regularly. Replace cracked cables, clean dirty contacts, and install fresh batteries when readings fade or the screen dims.
For reliable Battery health checks and Circuit testing, verify the tester against a known voltage source before use. Keep it dry, store it in its case, and avoid exceeding its rated voltage.
Follow the manufacturer’s calibration schedule for accuracy.
Are Voltage Testers Compatible With Hybrid and Electric Vehicles?
Yes, your voltage tester can become your vehicle’s electrical superhero, but compatibility depends on the tool. For Hybrid compatibility, use a meter specifically rated for high-voltage systems and follow the manufacturer’s procedures.
An ordinary tester may handle only the 12-volt auxiliary battery, not the traction circuit. With an Electric vehicle, never probe orange high-voltage cables unless your tester carries the correct CAT rating and you’re trained.
Safety must come first.
How Should You Store a Car Voltage Tester Safely?
Store your car voltage tester in a cool, dry place away from direct sunlight, moisture, and extreme temperatures. Remove its batteries if you won’t use it for an extended period, and inspect the leads for damage before storage.
For battery safety, prevent terminals from touching metal objects, and keep batteries away from children. Practice proper storage by coiling cables loosely, protecting probes with caps, and placing the tester in a sturdy case.
Conclusion
A car voltage tester turns electrical theory into visible proof. You select DC voltage, touch the probes to the correct points, and watch the reading reveal what’s happening.
A healthy battery should show about 12.6 volts at rest, while a running alternator typically produces 13.7–14.7 volts. If readings fall, fluctuate, or disappear across a connection, you’ve found resistance or a fault.
By testing step by step, you can verify the circuit instead of guessing. That’s how a car voltage tester helps you diagnose electrical problems with confidence.